Buying a hand-held woodworking tool can give an impetus to the development of a new and very exciting profession, which gathers more and more fans every year. Numerous video tutorials and photos containing authorial techniques for working with hand milling machines have been replicated on the Internet, which once again proves the popularization of the craft, which the Russian people have long been fond of. If you do not yet know all the basics of manual wood processing and just get acquainted with specialized household equipment, the following information will be useful to you.
What can be done with a hand mill?
Of course, we are unlikely to be able to list all those useful gizmos that can be made at home with a manual milling cutter, certain skills and desires due to the unlimited range of such crafts, but we will mention the most common ones, and if necessary, you can easily find Photos of such homemade products on the Internet.
So, armed with a manual milling cutter, even a novice master can easily cope with the manufacture of handrails, all kinds of racks and shelves, hangers and stools. Now it has become fashionable to breathe new life into old shabby furniture at home, and this process will definitely be within your power.

Also, a manual milling cutter will be indispensable where it is necessary to select grooves for future connections, insert a lock and even create a bizarre tricky pattern on a wood surface that serves as a decorative decoration. Even if you do not plan to hold such a versatile tool in your hands around the clock, it will certainly serve you well in everyday life sooner or later.
The basics of work
The cut depth here is regulated by a lifting mechanism that connects the two main parts of the milling cutter - the electric drive and the base. To be more precise, the parameters of the penetration of the cutter into the material to be processed are set by setting a certain distance between the pin and the washer located next to the motor. In order for the milling machine to maintain the same distance with respect to the edge of the workpiece, a straight guide is provided in it. Some models are equipped with a circular guide, with which it is possible to mill circles with a large radius. For small circles (radius less than 15 cm), technological holes are provided on the basis of the equipment into which a centering pin is inserted at a specified distance from the cutter.

The grooves are selected using an angular stop fixed to the machine body at a right angle. Before starting work, the carpenter must ensure that the blank of the future product is stationary, because the lack of a reliable support will inevitably lead to the fact that the edges of the groove will be curved, and this will negatively affect the final result of the work. Please note that in one pass it is not recommended to remove a layer of wood exceeding 5 mm. Sufficiently deep grooves according to the technology are selected in several stages. Work with a manual milling machine on a tree should be performed smoothly, without rushing and sudden movements, otherwise you will have to deal with such an unpleasant phenomenon as the torn edges of the groove.
Tool setup and start of work
A wood milling machine, like any other equipment, needs to be set up before starting the work process. First of all, remove the safety nut and clamp collet, after which the unit is started and a control cut is carried out. Next, check whether the screws and other threaded parts are tightly tightened and remove excess protective grease.
Beginners often make a mistake by not holding the milling apparatus firmly in their hands, or exert excessive force on the material being processed. At the corners of the workpiece, as well as when changing the direction of movement of the milling cutter, the speed of movement of the unit is not slowed down so as not to leave burning through overheating of the machine.

Work rules
Depending on the nature of the work performed, the carpenter chooses the method of their implementation. For example, the processing of curved surfaces differs from decorating a wooden craft with an openwork pattern, and the main thing here is to observe the rule of application of a particular technique, taking into account the peculiarity of a particular process. We have selected for you the most common cutting techniques, accompanying each method with thematic video material.
Open groove
If you plan to process the workpiece by forming a groove from the edge itself, position the tool so that the cutting element hangs over the edge of the wood. Then it is necessary to lower the knife to a predetermined depth and fix the position of the basket, after which the engine starts and the feed starts. When the edge is finished to the end, the cutter rises and the lock loosens, and only then can the engine be shut off. Blind grooves are formed in a similar way, with the only difference being that they do not start from the edge of the part.
Deep groove
In this case, after each pass of the treated area, it is necessary to adjust the new depth of immersion of the cutter in the wooden material, having previously turned off the milling cutter, and it is desirable that the depth does not exceed 5 mm. This rule especially applies to hard materials that require a careful approach to work. The last layer should not exceed 1.5 mm, which will make it possible to create a clean surface.
Narrow groove
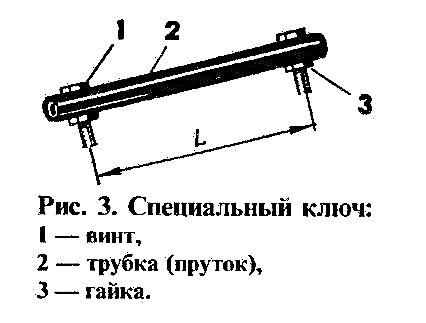
In this case, for greater convenience in work, the wood is processed using an additional tool. The process in progress consists in attaching a flat base to the sole of the unit. Guide rods are installed on both sides of the auxiliary plane, providing a straight path of the milling machine, the main thing is that their axes are aligned with the center of the knife. If the master will use an auxiliary device with the milling cutter, it must be carried out so that the rods are evenly pressed against the sides of the workpiece.
End face
Joinery of wood with a manual milling machine is often associated with the processing of the ends of the workpiece, and it is very important to get a clean edging. A rule checked in practice will come to help the novice master, stating that a fairly gentle slice is initially performed, while the tool is guided in the direction of rotation of the knife. With this design, the main part of the wood material will be chosen evenly, after which you will clean the end face in the usual way, leading the milling cutter against the direction of rotation of the cutting element, and the appearance of the workpiece will take on the necessary shape.
Curved edges
Milling curved edges with a manual milling cutter is performed in a slightly different way, and here the master will need templates with a stop ring. The ring itself is a round plate with a side that moves along the template, setting the torch the correct path. Such a part is fixed on the sole of the instrument using special fasteners, after which it can be used for its intended purpose.
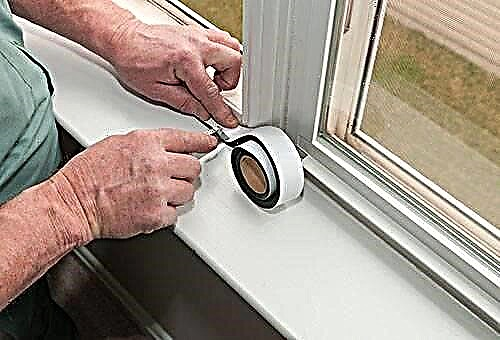
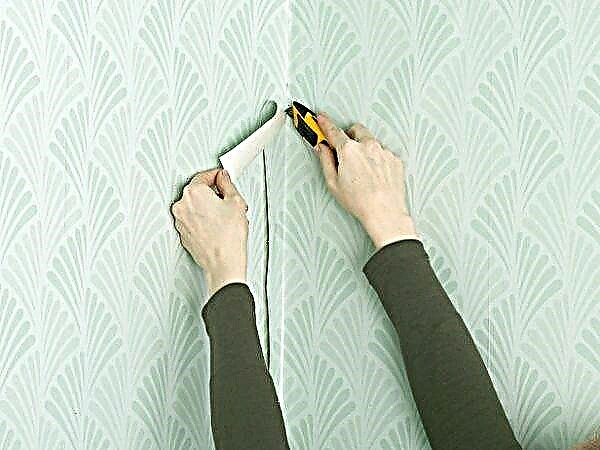
Before the start of the main process, the template must be fixed on the machined plane, and this can be done using ordinary double-sided tape, after which the resulting structure is pressed by clamps to the desktop. The use of templates allows you to create exactly the same products from which you can make furniture or any other interior details.
Decorative finish
Patterns on wood are designed to decorate carpentry, giving them a decorative "zest". Art milling is perhaps the most interesting method of processing natural material, because here masters can fully give vent to their imagination, and a manual machine will help to cope with such a task without any problems. Wood is very malleable in work, the main thing is to know how processing is carried out correctly so that the result is truly worthy.
In addition to the milling cutter, a vise, a jigsaw and a chisel will be useful here, which you will have to use during the work. A wooden canvas with a pattern transferred from the picture or photo you like is fixed on a stable surface. A tool with a special cutting nozzle smoothly leads along the contour of the drawing, carefully removing the layer of wood, thereby giving it volume. The use of cutters of different sizes will allow you to create a different ornament depending on personal preferences. Now you know how to work with a manual milling tool and you can try it in practice.